Friday, February 25, 2011

What Love Really Means

This week has kind of been one of those weeks. I have really struggled with a lot of stuff internally like body image, comparison, and jealousy (What girl doesn't, right?!) I have struggled with this for so long, and I am finally starting to really notice that I am doing it and I am always reminding myself to see God's love for me and that whenever I put myself down (which, unfortunately, is a lot) it really hurts God and hurts me too. Last week, I was on my way to class and I heard this song on the radio, and I just started to cry. The words at the end are saying that God is telling this person that he will love him for who he is and not what he has done, or who he will become. That was such an amazing moment for me. I felt very overwhelmed with God's love for me and now, I just need to constantly keep telling myself that to really really believe it. I feel like it will, yes, it will take some time, but I do feel like eventually it will come!

Thank you Jesus for dying for us and showing us the most amazing act of love ever.

Here is the song:


1 Samuel 16:7
But the LORD said to Samuel, “Do not consider his appearance or his height, for I have rejected him. The LORD does not look at the things people look at. People look at the outward appearance, but the LORD looks at the heart.”

Sunday, February 20, 2011

White Chocolate Strawberry Pie

Last week was our annual dessert auction at my Church in Newton. =) I made White Chocolate Strawberry pie, a Twinkie Cake and Cupcake poppers. Here are some posts on how to make them! =) Enjoy!!


First, gather the ingredients
Combine 4 oz of chocolate and the milk and melt them in the microwave and then set it aside
In a blender, mix the powdered sugar and the cream cheese until it is soft
Make about 1 teaspoon of orange zest

Add it to the mixture
Then, mix in the white chocolate mixture
Next, fold in the whipping cream
Wash and slice 2 cups of strawberries
Pour the mixture into the pie crust, and add the strawberries
Melt the remaining chocolate and drizzle it over the top of the pie
Stick it in the fridge until you serve!
Enjoy!! =D


White Chocolate Strawberry Pie –


1 box (6oz) white baking bars, divided
2 T. milk
3 oz. cream cheese,softened
1/3 c. powdered sugar
1 t. grated orange peel
1 c. whipping cream
1 graham cracker crust
2 c. fresh strawberries, sliced

In microwave, melt 4 oz. of baking bars with milk. Cool to room temp. Beat cream cheese and sugar in a mixing bowl until smooth. Beat in orange peel and melted chocolate. Fold in whipping cream. Spread into crust. Arrange strawberries on top. Melt the remaining baking bars; drizzle over berries. Refrigerate for 1 hour. Store in fridge.

Twinkie Cake

First: Gather the ingredients
Cook 1 cup of milk and 4 T. of flour, then set it aside to cool


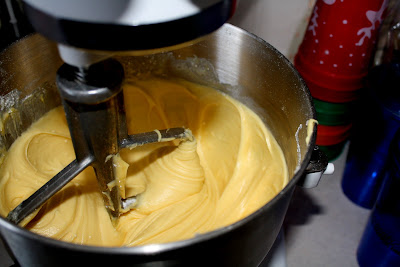
After you cook that, and set it aside, make the cake batter!
Mix all of the ingredients together and blend! Pour half of the batter into a 9x13 pan and cook it for about 13 minutes, or until golden. Cool it and cook the other half
While the cakes are baking, it is time to make the filling! Add the milk mixture, crisco, butter, sugar, ad vanila and blend until it is fluffy
After the two cakes are cooled,
Spread the filling on one of the cakes,

Then place the other cake on top and add some powdered sugar to make it look purty. =)

Enjoy!

Twinkie Cake

FILLING:
1 c. milk and 4 T. flour. Cool.

I pkg. yellow cake mix
1 (3 oz.) pkg. instant vanilla pudding
½ c. oil
1 c. water
4 eggs

Beat until mixed well. Pour half of batter (approx. 2 ½ c.) into sheet cake pan which has been lined with waxed paper, and the waxed paper greased. Bake 10 minutes at 350 degrees or until done. Cool just a little, then flip over onto board, or larger sheet cake pan. Bake second half – cool. Finish filling:

Add to flour and milk mixture:
1 c. butter flavored Crisco
½ c. softened margarine or butter
1 c. sugar
2 T. vanilla

Beat until smooth. Spread filling on cake that’s on board. Flip other cake over on top. Freeze until ready to serve. Can be stored in fridge or freezer. Cut right before serving.

Cupcake Poppers!

Beware: These are very very messy!

First: Gather the ingredients!
First, make the cake batter, same as what the box says
Then, divide the batter into either 5 or 6 different bowls
Then, add the gel food coloring to each bowl and mix
Scoop about a 1 Tablespoon into the mini cupcake tins
Bake for about 11 minutes
Let them cool and then place them on a wire rack to cool for a good while.
When the rest are baking, make the filling. Beat the marshmallow creme, butter and powdered sugar in a mixer, or use a hand mixer

Blend until fluffy
When the cupcakes are all cool, (make sure they are cool enough or you will have trouble), Cut the tops of the cakes off
Take the tops and add the filling in between each sandwich
Keep the cupcake bottoms for another project, or just have them as snacks!
It makes about 30 little cupcake popper sandwiches!
Enjoy!!! =D


  • Cupcakes
  • 1 box Betty Crocker® SuperMoist® white cake mix
  • 1/4 teaspoon each gel or liquid food colors (neon pink, neon purple, neon orange, neon green, classic blue)
  • Frosting
  • 1 1/2 cups marshmallow creme
  • 3/4 cup butter, softened
  • 1 1/4 cups powdered sugar

  • 1. Heat oven to 350°F. Spray 60 mini muffin cups. Make cake batter as directed on box. Divide batter among 5 small bowls, about 3/4 cup each. Make 5 different colors of batter by adding 1/4 teaspoon food color to each bowl; blend well.

  • 2. Fill each muffin cup with 1 level measuring tablespoon batter, making 12 cupcakes of each color.

  • 3. Bake 10 to 12 minutes or until toothpick inserted in center comes out clean. Cool 5 minutes; remove from pan. Cool completely, about 10 minutes.

  • 4. In large bowl, beat marshmallow creme and butter with electric mixer on medium speed until blended. Beat in powdered sugar until fluffy. Divide frosting among 5 small bowls, about 1/3 cup each.

  • 5. Assemble each popper using 2 mini cupcakes. Cut tops off each cupcake horizontally (save bottoms for another use). Spread or pipe about 1 tablespoon frosting on cut side of 1 cupcake top. Form a sandwich by placing cut side of second cupcake top on frosting; press lightly. Repeat with remaining cupcake tops. Store loosely covered.

Monday, February 7, 2011

Spring!

I am really over all of the snow, ice, and freezing rain. There are 41 days until spring, and those 41 days are going to feel like a year! To add to that, I am really not looking forward to the 7 inches of snow that Manhattan is supposed to be getting tonight. Lame. Ok, maybe I am a tad dramatic, but here are some pictures that might warm you up, even if the weather will make you frozen. =) Enjoy!